


Back at the beginning of January, I wrote about my foodie resolution for 2010, to bake more bread. A resolution made with the best of intentions, borne of visions of wholesome, proud loaves emerging from my kitchen one after another. Not to mention the great arms I was going to have (you know, from all the kneading).
However life got in the way, as it tends to, and for several weeks it was farmer’s market leaves and (gulp) grocery store sliced bread for me. After returning to the UK last week, I decided to give bread-baking another go, and I had just the recipe for it. Found in a cookbook (I don’t remember the name) my Mum had from the library, I hastily copied down the ingredients for this Milk & Honey bread in my journal during my last day at home. Something about the description intrigued me: a basic sandwich loaf with a soft texture, shiny crust, and slightly sweet flavour.
Unfortunately, the first version of this bread was nothing to write home about. Whether I interpreted my scribbles wrongly or whether the recipe was a dud in the first place I can’t be sure, but the resulting loaf was small and heavy, without the mild but vibrant flavour I’d been promised.
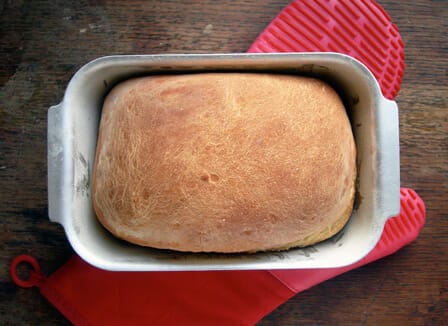
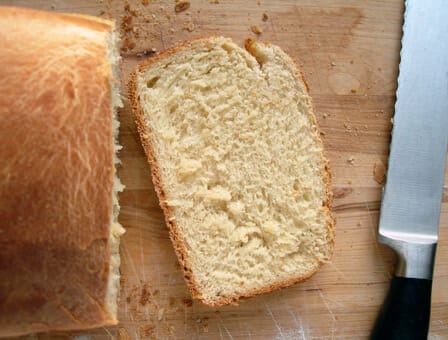
I’m not normally one to try a disappointing recipe twice (I just don’t have the patience for endless experimenting), but for some reason, I pressed on with this one. I’m glad I did because, after a bit of tweaking, version 2.0 was everything I’d been looking for. Chewy and sweet but not aggressively so, this bread makes wonderful toast, especially with savoury toppings (I’ve been enjoying this for breakfast, spread with butter and Marmite). Whether or not your own New Year’s resolutions are still going strong (anyone?), I highly recommend giving this one a go.
Milk & Honey Bread
makes 1 loaf
- 2 cups plain flour (or 1 1/2 cups plain, and 1/2 cup whole wheat)
- 3/4 tsp. instant yeast
- pinch salt
- 2/3 cups milk
- 2 Tbs. honey
- 1 Tbs. butter, plus extra for greasing
- Whisk together the flour, yeast and salt in a large bowl and set aside. Lightly butter and flour a 1lb loaf tin (not necessary if silicone) and set aside.
- Put the milk, honey and butter into a small saucepan, and heat gently until the butter has just melted. Allow to cool slightly, then pour into the dry ingredients and mix until the dough comes together.
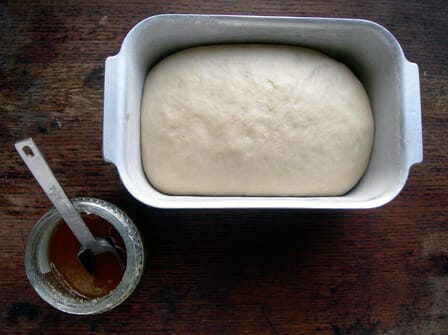
- Turn dough out onto a generously floured surface and knead for 8-10 minutes, until smooth and elastic. Form dough into a ball, butter it lightly (I just melt a small piece of butter between my hands and pat the dough all over) and place in a covered bowl. Leave in a warm place to rise for 1-1.5 hours, until doubled in size.
- When the dough has risen, punch it down and knead it for a minute or so to get all the air out. Form into an oval about the size of your loaf tin and place inside; cover and leave to rise again for 45 minutes.
- Just before your bread is done its second rising, preheat your oven to 200°C/400°F. Brush a little-melted butter over the top of the bread, or melt a bit between your fingers and simply pat it on. Bake bread for 30 minutes, until it is golden brown on top and sounds hollow when tapped on the bottom. Allow cooling before slicing.